
Hey fellow creatives! Have you ever stood mesmerized in front of a canvas, the smell of oil paint filling your nostrils, and thought, “Wow, how can I bring this into my digital world?” Or maybe you’re a digital native, fingers flying across a tablet, longing for the tactile experience of charcoal on paper. Well, you’re in the right place! This article is all about bridging the gap between the tangible and the virtual – how to take the best of both worlds and create art that’s truly unique and captivating.
I’m a big believer that the most exciting art often comes from unexpected combinations. Combining traditional art techniques with digital media isn’t just about convenience; it’s about expanding your artistic vocabulary and unlocking new creative possibilities. It’s about injecting the soul of old-school artistry into the precision and versatility of the digital realm.
Think of it like this: you have a whole box of vibrant crayons and a digital tablet capable of creating infinite colors and effects. Wouldn’t you want to play with all of them?
This guide will cover everything from understanding the fundamental principles to practical workflows and providing suggestions based on my experiences and what I’ve seen successful artists doing.
Why Blend? The Power of Synthesis in Art
Before we dive into the “how,” let’s talk about the “why.” What makes this blend so compelling?
- Texture and Tactility: One of the biggest strengths of traditional art is its inherent texture. The subtle variations in brushstrokes, the grain of paper, the way light catches on impasto paint – these are things that digital art has historically struggled to replicate. By incorporating traditional techniques, you can infuse your digital work with a sense of depth and realism that’s hard to achieve otherwise.
- Unique Aesthetic: The combination of traditional and digital elements often results in a distinctive visual style. It’s a visual conversation between the old and the new, resulting in something fresh and eye-catching. This can make your artwork stand out from the crowd, especially in the saturated digital art market.
- Expanded Skillset: Learning both traditional and digital techniques will broaden your artistic capabilities. You’ll develop a deeper understanding of color theory, composition, and other fundamental art principles, which will benefit your work across all mediums. And the tools used are ever-evolving.
- Creative Problem-Solving: Facing the challenges of merging these two worlds fosters creative problem-solving. Figuring out how to scan your textures or how to replicate a specific brushstroke digitally pushes your artistic boundaries.
- Personal Expression: Ultimately, this hybrid approach allows you to express yourself more authentically. You’re not limited by the constraints of a single medium; you have the freedom to choose the tools that best serve your vision.
Foundational Techniques: The Traditional Toolbox
Let’s start by revisiting the classics. Understanding the core principles of traditional art is crucial, even if you’re primarily working digitally. Think of this as building a solid foundation for a magnificent digital skyscraper.
1. Drawing & Sketching:
- Pencil: The humble pencil is your best friend. Practice sketching from life, focusing on form, proportion, and perspective. Experiment with different grades of pencils (HB, 2B, 4B, etc.) to achieve a range of values.
- Charcoal: Charcoal is fantastic for creating dramatic effects, blending tones, and capturing a sense of movement. Try different types of charcoal (vine, compressed, charcoal pencils) to explore their unique properties.
- Pen & Ink: Learn the art of line work! Pen and ink are excellent for creating detailed drawings and developing a strong sense of form. Experiment with cross-hatching, stippling, and other techniques to create textures and values.
- Suggestion: Check out Proko’s online courses on figure drawing. His methods are incredibly helpful for understanding the human form. https://www.proko.com/
2. Painting:
- Watercolor: Watercolor is known for its transparency, fluidity, and ability to create luminous effects. Mastering watercolor washes, layering, and masking techniques will give you a fantastic understanding of color mixing and control.
- Acrylic: Acrylic paints dry quickly and are incredibly versatile. They can be used for a wide range of techniques, from thin washes to thick impasto. Acrylics are also great for beginners.
- Oil: Oil paints offer rich colors, slow drying times, and the ability to create smooth blends. While they require more patience and ventilation than other mediums, the results can be stunning.
- Suggestion: Explore the work of artists like James Gurney, who combines traditional techniques with digital media to create stunning illustrations. His blog is a treasure trove of information: https://gurneyjourney.blogspot.com/
3. Color Theory:
- Understanding the Color Wheel: Become intimately familiar with the color wheel, primary, secondary, and tertiary colors, and how they relate to each other.
- Value: Learn to see value – the lightness or darkness of a color. Value is crucial for creating depth, form, and visual interest.
- Hue, Saturation, and Value (HSV): Digital art tools often use the HSV color model. Understanding these three components (hue = color, saturation = intensity, value = lightness/darkness) will greatly improve your digital color mixing.
- Suggestion: I strongly recommend Betty Edwards’ “Color and Light: A Guide for the Realist Painter.” This book offers great insights into color perception.
4. Composition:
- Rule of Thirds: Learn how to divide your canvas into thirds, both horizontally and vertically, and place your points of interest along these lines or at their intersections.
- Leading Lines: Use lines to guide the viewer’s eye through your artwork.
- Balance and Symmetry: Experiment with different types of balance (symmetrical, asymmetrical, radial) to create visual harmony.
- Negative Space: Don’t underestimate the power of empty space! Negative space can be just as important as the objects in your artwork.
- Suggestion: Study the compositions of master painters throughout history. Visit art museums (virtually or in person!) and analyze how they use composition to draw the viewer’s attention.
Digital Tools: Harnessing the Power of Technology
Now, let’s explore the digital side of the equation. There are many excellent software and hardware options available.
1. Digital Painting Software:
- Adobe Photoshop: The industry standard. Photoshop offers a vast array of features, including painting tools, photo manipulation, and compositing capabilities. It’s complex but incredibly powerful.
- Corel Painter: Designed specifically for digital painting, Corel Painter emulates traditional art materials with remarkable realism. It’s known for its impressive brush engine.
- Clip Studio Paint: An affordable and versatile option, popular among comic artists and illustrators. It excels in creating line art and detailed illustrations.
- Procreate (iPad): A powerful and intuitive painting app for the iPad. It offers a wide range of brushes and features, making it a fantastic option for on-the-go art creation.
- Krita: A free and open-source digital painting program, Krita is a great alternative for artists on a budget. It offers a wide range of features and a customizable interface.
- Suggestion: Download trial versions of the different software programs and experiment with them to see which one fits your workflow and preferences best. Look at online reviews and tutorials to help you decide.
2. Drawing Tablets:
- Wacom Cintiq: These pen displays allow you to draw directly on the screen, providing a natural and intuitive drawing experience. Expensive but the industry standard.
- Wacom Intuos: A more affordable option, this tablet connects to your computer and allows you to draw on a pressure-sensitive surface.
- Huion and XP-Pen: These brands offer excellent pen displays and drawing tablets at more budget-friendly prices. They’re becoming increasingly popular.
- iPad Pro with Apple Pencil: Offers a great balance of portability and power. Procreate is designed to work seamlessly with the Apple Pencil.
- Suggestion: If possible, try out different tablets at a local art supply store to see which one feels the most comfortable in your hand. Consider the size of the drawing area and the pressure sensitivity of the pen.
3. Scanning and Photography:
- High-Resolution Scanner: Essential for digitizing your traditional artwork. Choose a scanner that can handle the size of your artwork and capture fine details.
- Camera and Tripod: A good quality camera can also be used to photograph your artwork. Use a tripod to ensure stability and even lighting.
- Lighting: Consistent lighting is essential for accurate scans and photographs. Use natural light whenever possible or invest in a set of studio lights.
- Suggestion: Learn about color correction techniques in Photoshop or other image editing software to ensure that your scanned or photographed artwork accurately reflects the original colors.
Blending the Two Worlds: Practical Workflows
Now, let’s get into the fun part: putting it all together! Here are a few workflows to get you started:
1. Scan and Paint:
- Create a Traditional Base: Start by creating a drawing or painting using traditional techniques (pencil, charcoal, watercolor, etc.).
- Scan Your Artwork: Scan your artwork at a high resolution to preserve detail. Clean up any imperfections in Photoshop.
- Digital Painting: Open the scanned artwork in your digital painting software. Use it as a base and add digital paint layers to enhance or modify the artwork. Experiment with textures, colors, and effects.
- Layering and Blending Modes: Use layers and blending modes (multiply, overlay, soft light, etc.) to blend the traditional and digital elements seamlessly.
- Final Touches: Add final details and adjustments in your digital software. Example: You could start with a watercolor wash, scan it, and then digitally add details like fine lines and textures to create a vibrant illustration.
2. Texture Integration:
- Create Textures: Create textures using traditional techniques like ink splatters, dry brush strokes, or paper crumples.
- Scan Textures: Scan your textures at a high resolution.
- Import into Digital Software: Import your textures into your digital painting software.
- Apply Textures: Apply the textures to your digital artwork using blending modes, layer masks, or other effects. Experiment with opacity and scale to achieve the desired look.
- Blending and Refining: Blend the textures with your digital painting to create a cohesive and visually interesting piece. Example: You could create a set of ink splatters, scan them, and then apply them to your digital painting as textures, making it look less “clean” and adding depth.
3. Hybrid Techniques:
- Digital Sketch & Traditional Finish: Create the initial sketch digitally, refine it, and then print it out. Use the printed sketch as a guide to create a painting using traditional media.
- Traditional Drawing & Digital Coloring: Create a detailed drawing using traditional pen and ink, then scan it and color it digitally.
- Digital Underpainting & Traditional Glazing: Create an underpainting in your digital software, print it out, and then use it as a base for oil painting. Apply layers of transparent glazes to add depth and color. Example: A comic artist could sketch the layouts and characters digitally, print them, and then use traditional ink and watercolor to create the final artwork.
4. Photography and Digital Manipulation:
- Photograph Textures and Elements: Go out and take photos of interesting textures, like brick walls, rusty metal, or foliage. Also, take photos of objects and elements you might want to incorporate.
- Import and Manipulate in Software: Import these photos into your digital art software. Use them as textures, backgrounds, or elements to add depth and realism to your digital artwork.
- Experiment with Compositing: Use layer masks and blending modes to combine these photographic elements with your digital artwork.
- Adding Effects: Add effects like color grading and filters to integrate the photos into your piece. Example: Take a photo of a crumbling brick wall, scan it, and overlay it in your digital painting of a cityscape to give the impression of an aged urban environment.
5. Stop Motion Animation (A More Advanced Approach):
- Create Traditional Elements: Make individual frames by drawing, painting, or creating other physical objects.
- Photograph Each Frame: Take a photograph of each frame using a camera or smartphone.
- Import and Assemble: Import the photographs into animation software (like Adobe Animate or OpenToonz) and assemble them into a sequence.
- Add Digital Effects: Refine the animation by adding digital effects such as color correction or special effects. Example: Create a stop-motion animation of a painted character moving across a watercolor landscape.
Suggestion: Don’t be afraid to experiment! Try different combinations of techniques and materials to find what works best for you. There’s no right or wrong way to do this. Check out YouTube for countless tutorials. Search terms like “digital painting techniques,” “blending traditional and digital art,” or “texture in digital art” will get you started. Look into resources such as Skillshare and Udemy. These platforms are excellent for in-depth courses.
Tips for Success: Staying Inspired and Focused
Blending traditional and digital art can be a challenging but incredibly rewarding journey. Here are some tips to help you stay inspired and focused:
- Practice Regularly: Consistent practice is key. Dedicate time each day or week to work on your art.
- Study the Masters: Analyze the work of artists you admire, both traditional and digital. Learn from their techniques and approaches.
- Experiment Freely: Don’t be afraid to try new things and make mistakes. Experimentation is essential for growth.
- Find Your Style: Don’t get caught up in copying others. Develop your unique style.
- Join a Community: Connect with other artists online or in person. Share your work, get feedback, and learn from others. Online forums like DeviantArt (now known as “Artisan”) and ArtStation are great places to find inspiration and connect with other artists https://www.artstation.com/
- Set Realistic Goals: Don’t try to learn everything at once. Break your learning process into smaller, manageable goals.
- Take Breaks: Step away from your artwork when you feel frustrated or burnt out. Come back with a fresh perspective.
- Stay Curious: Always be learning and exploring new techniques and tools. The art world is constantly evolving. Subscribe to art magazines or follow artists on social media.
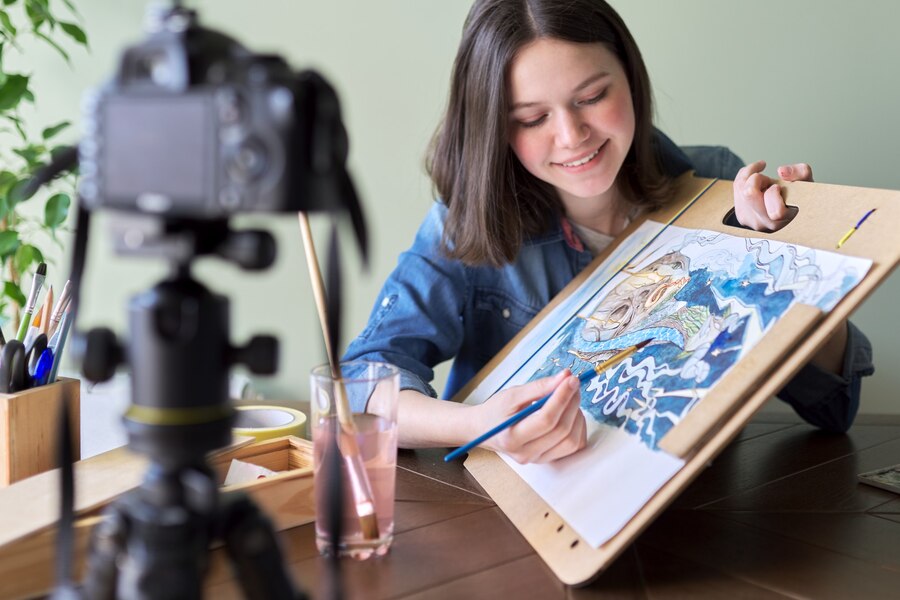
- Document Your Process: Take photos and videos of your work in progress. This will not only help you track your progress but also provide valuable content for sharing on social media.
- Most Importantly: Have Fun! Art should be enjoyable. Don’t let the technical aspects overshadow the joy of creating.
Common Challenges and How to Overcome Them
Blending traditional and digital art isn’t without its hurdles. Here’s how to address some common challenges:
1. The Learning Curve:
- Problem: Both traditional and digital art require skills and knowledge. It can feel overwhelming to master both.
- Solution: Start with the basics. Focus on fundamental art principles and gradually learn new techniques and tools. Break down your learning process into small steps.
2. Matching Colors:
- Problem: Colors can appear differently on your monitor than they do on paper.
- Solution: Calibrate your monitor. Experiment with color profiles in your software. Try color-matching tools (physical or digital) to compare colors accurately. Scan or photograph your traditional artwork in good lighting conditions.
3. Achieving Textural Consistency:
- Problem: Replicating the subtle textures of traditional media digitally can be tricky.
- Solution: Use high-resolution scans of textures. Experiment with different brushes and blending modes in your digital software. Create custom brushes that mimic the effects of traditional tools. Use a combination of digital and traditional textures.
4. Equipment and Software Costs:
- Problem: Digital art can require an investment in hardware and software.
- Solution: Start with affordable options. Consider a used drawing tablet or a free/low-cost software like Krita. Explore free online resources. Look for deals and discounts on software subscriptions. Consider an iPad Pro with Apple Pencil and Procreate, a powerful mobile and relatively affordable option.
5. Workflow Integration:
- Problem: Combining different workflows can be complex and time-consuming.
- Solution: Experiment with different workflows and find one that suits your style and preferences. Document your workflow and refine it over time. Simplify your process wherever possible. Create templates and presets to streamline your workflow.
Frequently Asked Questions (FAQs)
Here are answers to some of the most common questions I get about blending traditional and digital art:
1. What’s the best software for beginners?
- Answer: For beginners, I often recommend Clip Studio Paint or Procreate (if you have an iPad). They are generally more affordable than Photoshop, have intuitive interfaces, and come with great features specifically designed for artists. However, if you’re serious and want to learn industry standards, Adobe Photoshop is an excellent choice, but the learning curve is steeper. Krita is a fantastic, free open-source option.
2. Do I need a drawing tablet?
- Answer: While you can technically create digital art with a mouse, a drawing tablet with a pressure-sensitive pen is highly recommended. It provides a much more natural and intuitive drawing experience, allowing you to control line weight and opacity. It makes a huge difference in your ability to create expressive artwork.
3. What’s the best way to scan my artwork?
- Answer: A flatbed scanner is the best option for scanning artwork. Make sure your scanner has a high resolution (at least 300 dpi) and supports color correction. Clean the glass of your scanner regularly. Position your artwork flat on the scanner bed, and use a document scanning app on your phone in a pinch but the result will not be the same.
4. How do I choose the right brushes in my digital software?
- Answer: Experiment! Try out the different brushes included in your software and adjust their settings (size, opacity, flow, hardness) to see how they affect your artwork. Create your own custom brushes by combining different textures and settings. Explore online brush libraries. Study the brushes used by other artists.
5. How do I know when to use traditional vs. digital techniques?
- Answer: That’s entirely up to you and your creative goals! Consider the effect you want to achieve, the time you have available, and the skills you possess. Sometimes, starting with traditional media and finishing digitally offers the best of both worlds. Other times, a purely digital approach makes more sense. The key is to experiment and find the combination that works best for your vision. Try and see what happens. Often, the most interesting art emerges when you’re willing to go off the beaten path.
Final Thoughts: Embrace the Fusion
Blending traditional techniques with digital media is an exciting and evolving field. It’s not just about using new technology; it’s about expanding your artistic vision and creating something truly unique.
Remember, the journey of an artist is a lifelong one. Embrace the learning process, experiment fearlessly, and never stop exploring. By combining the best of both worlds, you can unlock your full creative potential and create art that is both timeless and innovative.
I’d love to hear about your experiences! What are your favorite techniques for blending traditional and digital art? What challenges have you faced? Share your thoughts and tips in the comments below! Let’s create a community of passionate artists who share their knowledge and inspire each other.
Thanks for reading, and happy creating!